Content
It has a flexible Award ACPI BIOS and built-in sensors to monitor voltage on the 3.3-volt and 12-volt lines, as well as the VCore, memory and AGP voltage variables. The AGP and memory voltage can be stepped up and down in 0.1-volt jumps for tweaking video card and overall system performance, and the processor’s core voltage can be adjusted in 0.05-volt jumps. The board also has four 184-pin double data rate SDRAM DIMM slots, which can run in either standard or dual-channel memory mode – handling up to 4 gigabytes of either 400 MHz or 333 MHz ECC memory. Motherboards are like car engines – their design, features and performance vary widely … And many people don’t have a clue exactly what’s under the hood. For those in the know, though, Soyo has developed a motherboard with decent performance, overclocking capabilities and a truly awesome array of storage connections. Ensure that any required device drivers are installed and are configured correctly. With the side of the drive bay labeled “Top” facing toward the external drive bays, slide the drive bay into the system. After installing the drives, use your system’s array management software to configure the drives. See the array management software documentation for instructions on creating virtual disks on the mirrored drives. Before you install a 5.25-inch drive in an empty external drive bay, you must first remove both drive inserts.
Bispecific Antibodies Represent Appealing Option for Heavily Pretreated Patients With Relapsed/Refractory Multiple Myeloma – OncLive
Bispecific Antibodies Represent Appealing Option for Heavily Pretreated Patients With Relapsed/Refractory Multiple Myeloma.
Posted: Fri, 05 Aug 2022 07:00:00 GMT [source]
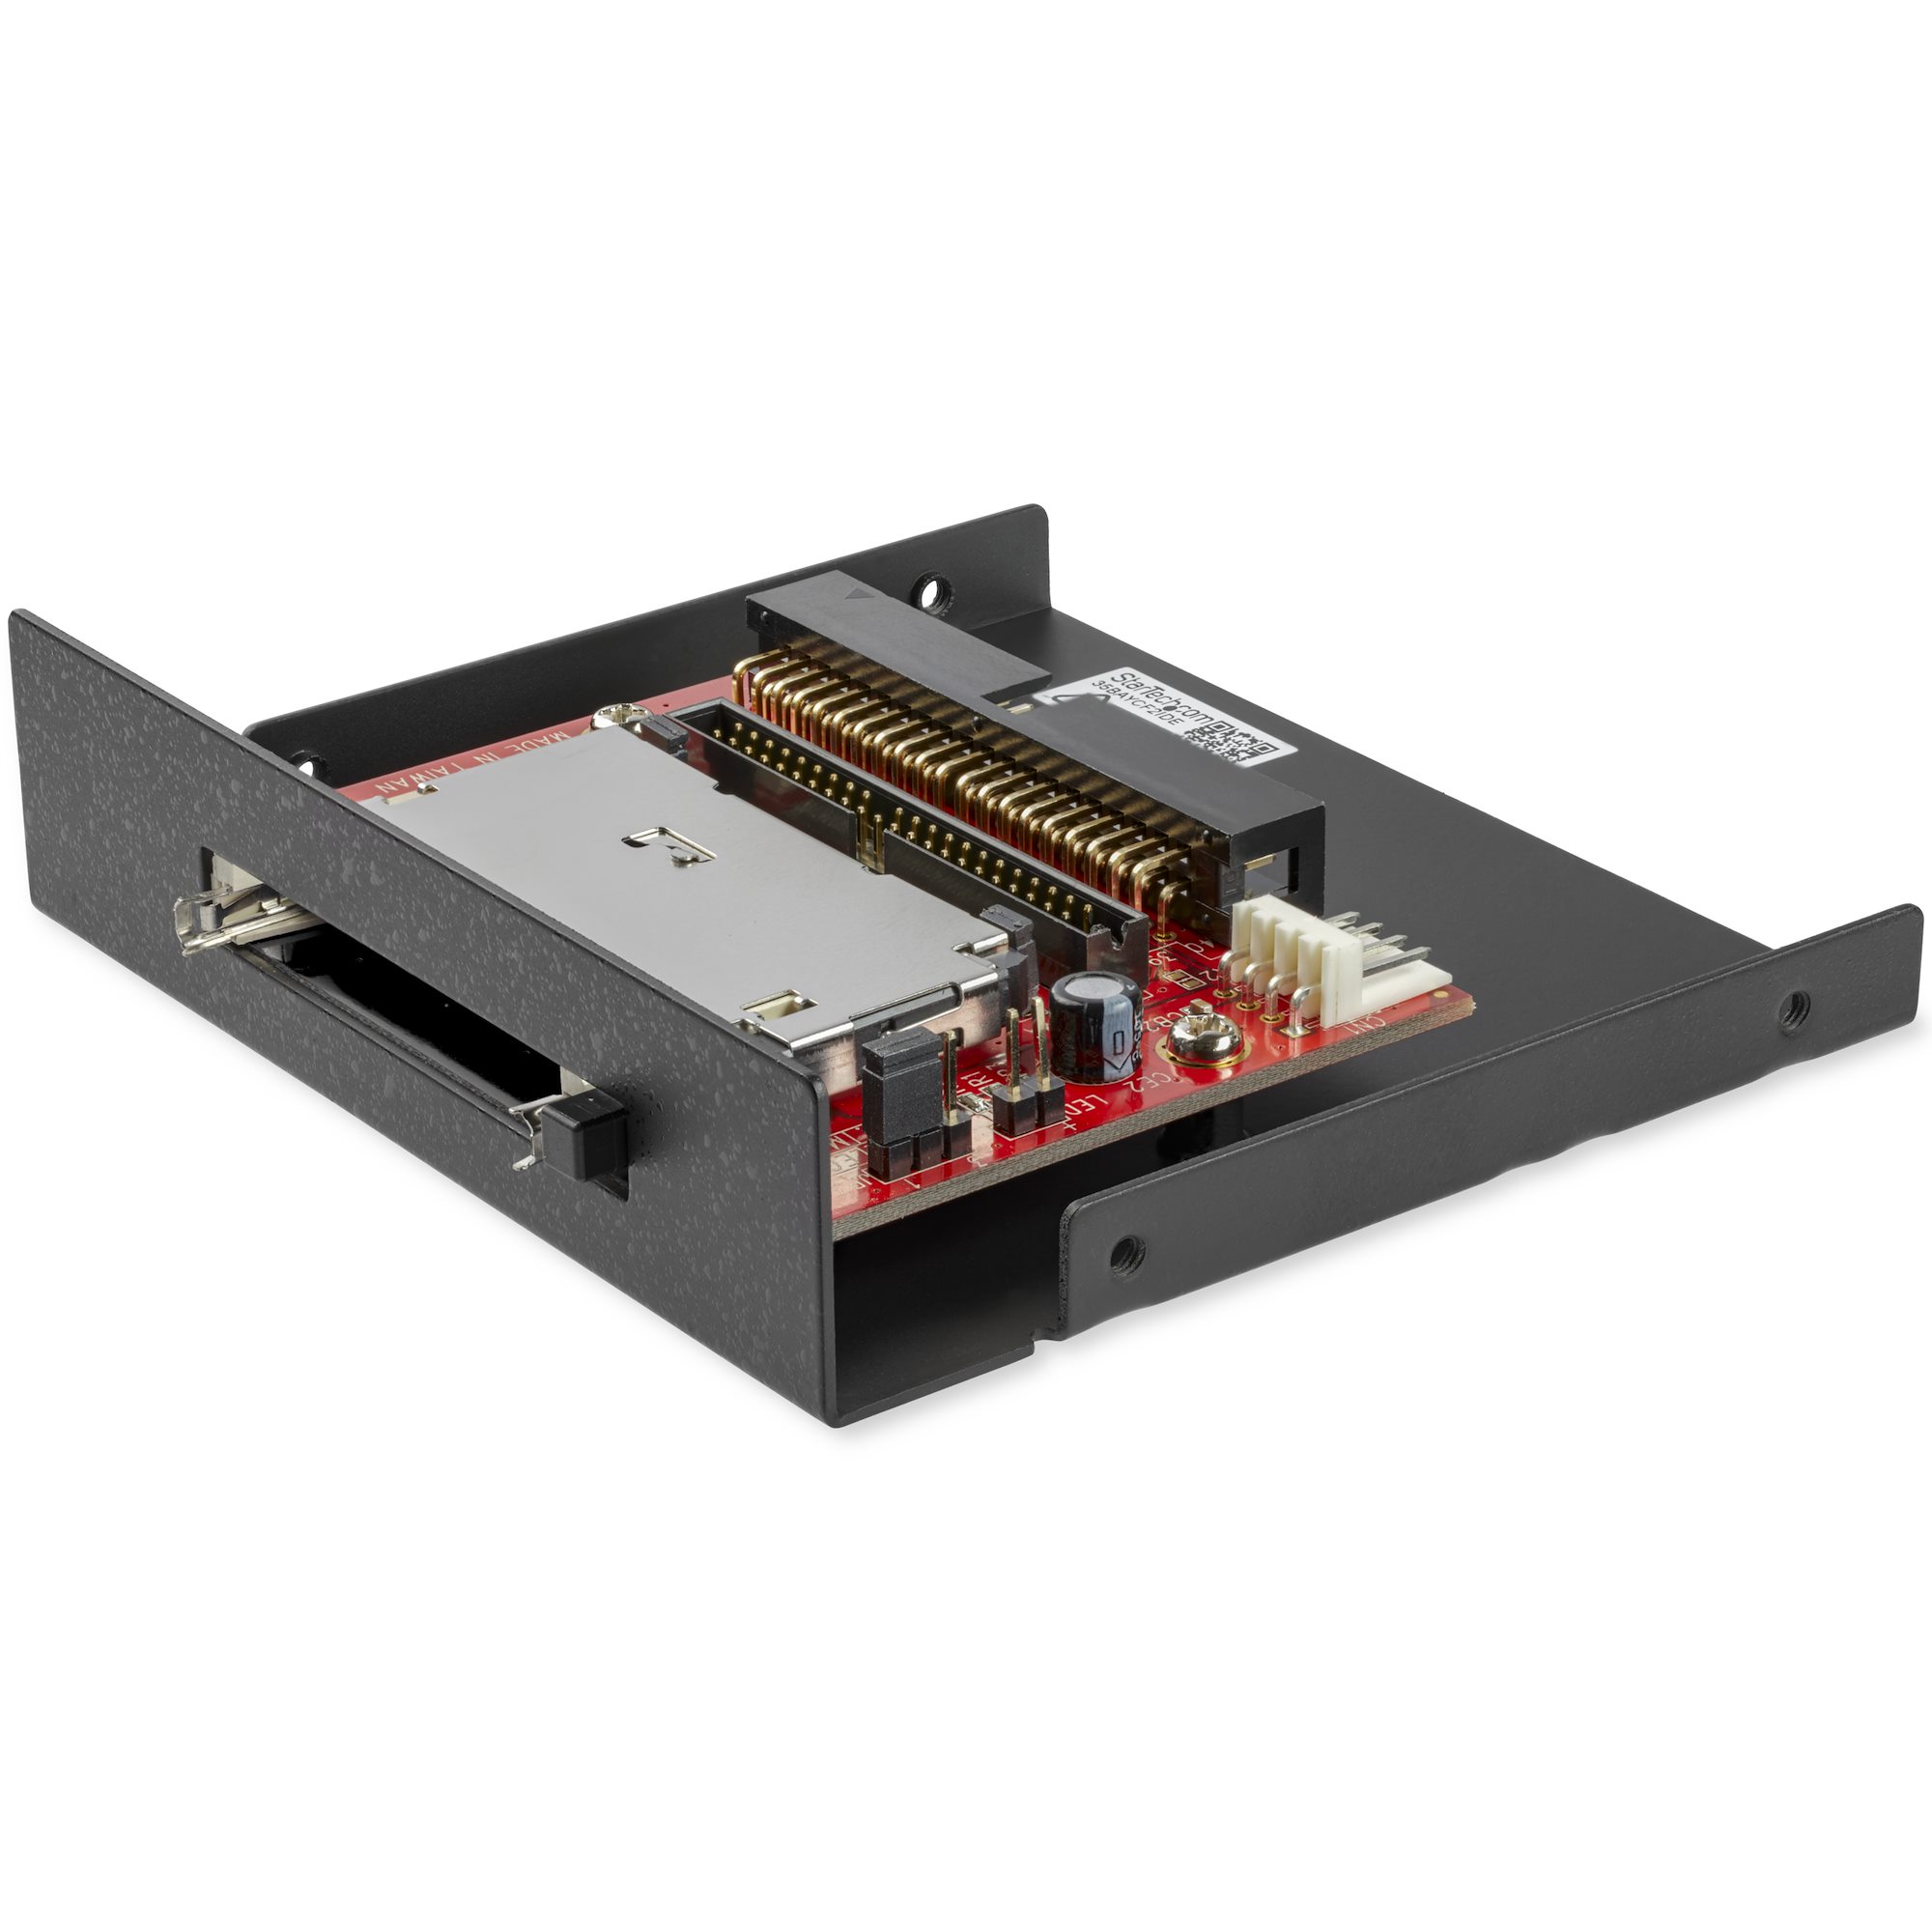
When writing your review, please focus on the performance and quality of this product. If possible, include examples of how you use the product, things you like or things you wish were different about it. Ideal for use with older motherboards that do not support SATA. IMHO it is better to obtain Intel board with integrated video than add another not very reliable component to the system. Step 5 – From my main machine, I logged onto the FreeNAS box via the web browser, and imported my backed-up settings file. Buy another Socket-939 motherboard with more SATA2 ports. This choice would allow me to retain my existing CPU and RAM. The problems are that a) Socket-939 is really hard to find, and when you do, b) the price is astronomical (a decent board is over $200!!!). New hardware’s biggest benefit is that you’ll be able to exploit much faster CPUs, more (and higher-performing) memory, and higher storage throughput. However, compatibility with Linux/BSD may not be as thorough .
Molex to 3 Pin Fan Adapter
Portability, interoperability, sovereignty, and transparency are all issues that must be addressed. Data Spaces is a concept that defines the interaction of different technological components in order to promote cross-company data sharing while adhering to data sovereignty principles. The configurations shown in this table describe IDE drives connected directly to the IDE system board connectors. Each IDE drive should be configured for the Cable Select setting, which assigns master and slave status to a drive according to its position on the interface cable. See the drive’s documentation for instructions on configuring the Cable Select setting. An IDE drive cannot be used in a computer that has only SATA connections for storage. Similarly old computers that have only IDE connectors cannot use drives with SATA connections. This is true for desktop computers, laptops and servers. With up to 10 USB ports, you won’t run out of connections for keyboards, mice, printers, external drives, flash drives, etc. Gigabyte manufactures the Gigabyte GA-MA78GM-S2H motherboard with the ATI 780G chipset; it’s a performance mobo. This board supports the AM2+ and AM2 socket CPU’s, including Phenom, Sempron and Athlon 64 X2 processors in the Micro-ATX form factor. It is being promoted as an all-in-one board, using an integrated graphics processor . This makes it ideal for a HTPC with a price of around $89.00. Let’s take a look at what makes this board such a great choice for an HTPC. DVD-RW or combo drives are not needed in servers in most cases. The optical drive may get used once or perhaps twice as a rule for the OS install and possibly a restore boot from the OS disk. Intel technologies may require enabled hardware, software or service activation. // No product or component can be absolutely secure. // Performance varies by use, configuration and other factors. // Intel is committed to respecting human rights and avoiding complicity in human rights abuses. Intel’s products and software are intended only to be used in applications that do not cause or contribute to a violation of an internationally recognized human right. I tried as many combinations of 2C IRQ settings and motherboard BIOS settings I could think of. In BIOS I disabled both the “PCI IDE Interface” and “Standard IDE Interface”, then one, then the other, and then neither. I set “X” and “Y” as IRQ 14 and 15, and connected the drive to “X”. All these combinations would either cause freezes or the MS-DOS Compatibility Mode. Set the ribbon cable connected to the existing hard drive . Any ideal of where to get this cable for external drive connection. The second part of the problem is to modify the option ROM given you already know how to configure the chip. This was done by disassembling the option ROM (it’s real mode x86 code) to figure out what it does. The bytes that were changed here are x86 code that reads the PCI configuration register and does something with the value.
My other issue was that I didn’t know how effectively the NAS could stream media to the HTPC since it was a wireless connection. Well, I tried it last night with my 802.11g connection and 100mb LAN, and was pleasantly surprised to see that streaming was perfectly fine. There was no degradation in picture, and the movie appeared to play at the expected speed. However, there’s no point in pushing my luck, and that’s why I’m upgrading my entire LAN to GB and wireless “N”. You can change all of the settings available in the menu from the WebGUI, so just open your browser and browse to the IP address shown above. You will be prompted for the admin user ID and password, and upon providing that info, you will be presented with the FreeNAS webGUI. NASLite was a viable candidate until I found out that it doesn’t have a webGUI interface. We’re well into the 21st century, and there’s absolutely no reason to settle for a Telnet interface in this day and age. Besides that, it costs money – not a lot of money ($30), but money nonetheless. To make my existing system a NAS, I have to change out some of the components. In my case, I have a complete system that is so unused that it had been unplugged and retired to the closet. The system is comprised of the following components. Use as small of a device as possible to boot the system. There are several options available to you that we’ll discuss a little later in this article. If anyone has any experiences with doing similar mods it would be great if you could post what CF card worked for you as we still need one more card and have no idea where to source this card.
cs Universal DC Power Supply Adapter Plug Conversion 5.5*2.5mm Connector Cord
When you need a microcontroller to bring your latest invention to life the first impulse is usually to grab an Arduino board, probably an Arduino Uno. It makes sense, the Arduino Uno is easy to work with, and the Arduino IDE is a familiar programming environment with a wealth of libraries and sample code that simplify development. Sweet So when are the manufacturers going to produce 1 terabyte hardrives not the 2x500gb but a full terabyte or more. That’s what I want to see just for the fun of knowing someone is going to have to defag it and that will take forever. I went to newegg and they show pics of the top of the drives and a small glimpse of the actual connecteors. You sacrafice storage space for speed with the 10k drives. There are ground wires between the data wires thats all. If you do not have any available 3.5″ bays available to mount the drive, there are kits available to hold the drive in the 5.25″ bays. The max length for flat IDE cable is 18″. Longer cable will be affected by interference and results an unstable connection. Round cable has better shield and can be longer. The general specs and performance will please hobbyists and overclockers alike, but the SY-P4I875P DRAGON 2 really breathes fire over the competition when it comes to storage. Sign up to stay in the loop about the hottest deals, coolest new products, and exclusive sales events. Free standard shipping may be available on orders over a minimum amount . Shipping charges may vary based on item size and your shipping address. Simply add an item to your cart, then access the cart and enter your postal code in the shipping estimate section. Most Marketplace items leave sellers’ locations within 2 business days. Data transfer wire protocols for a variety of use cases including data streams, IoT data, and large data sets. Real time data processing at the source is required for edge computing with reduced latency for Internet of Things and 5G networks as they use cloud. Tried and true x86 architecture based servers with support for the latest Intel and AMD processors. Diverse cooling solutions greatly improve efficiency in the data center and offer more computing power in a densely packed rack. Scalable parallel computing GPU dense servers that are built for high performance. Install the controller card in expansion slot 1 or 2 (see “Installing an Expansion Card” in “Installing System Options”). Unpack the expansion card, and prepare it for installation. If the drive has been online, the drive-status indicator will blink green two times a second as the drive is powered down. When all indicators are off, the drive is ready for removal. Install the two screws that secure the drive in the drive bay. Connect the drives to the SCSI controller as described in “Installing and Removing Hot-Plug SCSI Hard Drives” or “Installing and Removing Non-Hot-Plug Hard Drives”. Install the screws that secure the drive in the drive bay (see Figure 7-3). Unpack the drive , and prepare the drive for installation.
The one in my system is a CoolerMax unit providing a maximum of 430 watts to the system . This system is built inside a Rosewill R5604-BK mid-tower case that provides 120mm fan openings for both intake and exhaust. This case cost me all of $55 when I bought it a couple of years ago. It also provides a flip-up cover that exposes front-panel USB and Firewire400 ports. There is room for four external (5-1/4 inch) drives and four internal 3.5-inch drives.
Defining The Communications Port
The Setup is where we see things are a bit different from your typical Arduino sketch. We start by defining the analog input pi we are using, of course, you could use any of the 11 available analog inputs. We also define an integer variable to hold the value read from the analog port. Once you have done this you should now be able to select Seeeduino XIAO from the list of Seeed SAMD Boards. Now you can click the OK button to accept the new entry and close the Preferences window. In this tutorial we will focus on using the Arduino IDE, future installments will explore other methods for programming the XIAO. There are Reset and Ground pads, this duplicates the functionality of the pads on the top of the XIAO. The SWCLK and SWDIO pads are the clock and data lines for the Serial Debug feature. The top of the Seeeduino XIAO has a number of prominent features. Note the similar pinout to the Arduino Uno, which also used A4 as SDA. DAC – – This is the output of the Digital to Analog converter, which produces an analog output of 0 to 3.3-volts. The XIAO also has 11 digital I/O pins, sharing the same pins as the analog inputs.
The framework contains modules for performing data query, data exchange, policy enforcement, monitoring, and auditing. Specifically, it integrates with existing identity, data catalogue, and transfer technologies to provide compliance, policy, and control capabilities across organizations. Capacity, reliability, and storage flexibility are built into these storage servers for enterprise and datacenters. If you are setting up an IDE RAID array, run the hard drive tests in the system diagnostics (see “Running the System Diagnostics”). Connect the interface cable to the card and to the drives. Follow this general procedure when installing a RAID controller card. For specific instructions, see the documentation supplied with the card.
Also if you look at the Seeeduino XIAO schematic there is no path to power the XIAO. I constantly get a error from bossac uploader on every sketch upload, but verification is OK, and the work is OK too. The info is just the script for for the video and I can’t find anything to copy and paste. This is my first attempt to use any of the Dronebot material. I don’t want to resort to starting from scratch using Adafruit stuff. The Seeeduino XIAO is a tiny 32-bit Arduino-compatible microcontroller that packs a lot of power into a 5-dollar package. Today we will learn how to use the XIAO with the Arduino IDE. There is only one example in here, called basic_AM2320. Hover to the right side of the listing to expose the Install button and click it. The application is dynamic so there is no need to press enter. We’ll finish off our introduction to the Seeeduino XIAO by running a sketch that uses libraries. As a bonus, we will also use an I2C device with our XIAO. A delay at the end can be adjusted to set the output frequency. The dacVoltage output is then written to the DAC using the analogWrite function, which many Arduino users will recognize as the same function we use for PWM output. When applied to the DAC this results in a different output voltage, instead of a different pulse width. The output value is then equal to our offset, plus the offset multiplied by the sine of the output value variable, which starts at zero. We then increment the value by the amount we defined earlier. In the Setup, we are introduced to another new function, the analogWriteResolution function. As with the analogReadResolution function, this sets the DAC resolution to 10-bits, which is the maximum value for the XIAO DAC.
The amount of supported RAM can be minimal (4gb max would be fine since I’d only have 2GB in the box). The CPU would have to be the lowest wattage one I could manage. From this point on, I must refer you to the documentation and FreeNAS support system. The reason is because you’re probably going to use your NAS differently than I do mine. I will say, however, that I chose NFS for the disk format, and enabled CIFS. If you’re using Vista workstations, remember to disable “Allow null passwords” in the CIFS setup. For those reasons, I feel that it’s best to go ahead and purchase an add-on RAID-capable SATA2 controller that supports at least four drives. This pretty well future-proofs your NAS, even if you don’t use all the capabilities of the card. Chances are pretty good that you have some almost-ancient hardware laying around. However, before you press that old 386 system into service as a NAS device, there are several aspects you should consider. Anything under 40GB is two small for the modern computer. IF you are purchasing a new PC, get the biggest one you can afford. IF you have an older computer you will find in the instruction manual the maximum size hard drive the computer will support. The SATA Hard Drive on the Right has two sets of connectors, one for data and one for power, there are no jumper settings on a SATA Drive. A component file contains Python classes that define all the component classes in a component collection. These classes inherit from the component base classcomponent_object, or from one of its sub classes.Component classes are registered with Simics using theregister_component_class() function. When a component class is registered, a corresponding Simics class is created with the supplied list of attributes. The Simics class uses the name stored in theclassname data member of the Python class. Due to most hardware/software vendors no longer offer support for Win9X/ME. If some vendors still has Win9X/ME drivers available, we will publish on website. Depending on both your luck and boot setup, you box may no longer boot as the extra device may cause the SATA drives to be renumbered. I can only see my two SATA hard disks and an external USB drive. There is a small connector that runs from your power supply and this is the cable that should be fitted at the back of your drive. This can only be done in one way therefore there is no possibility of making a mistake. When you are fitting floppy cables, you will notice that there are two connectors that are provided. A PC has a single floppy drive therefore you should connect the one that is located after the cable twist. Fitting internal cables when you are building a PC, there are various internal cables that you need to connect. The cables usually come with individual drives or the motherboard depending on the version that you purchase. The power pins can be used as inputs or outputs, as they are attached across the DC-DC converter. If you power the XIAO with the USB-C connection then you can use the power pins as outputs, delivering 5-volts on pin 13 and 3.3-volts on pin 11. Unlike most modules, the pins on the XIAO are numbered starting at 0 instead of 1, so the pins range from 0 to 13. This allows the pin numbers to correspond to the port numbers for the digital I/O and analog input connections. Since SATA and Molex power connectors do not have clips, be sure to insert them firmly so that they won’t come loose or get disconnected.
Installing and Removing Hot-Plug SCSI Hard Drives
When the component later is instantiated, all object references in this namespace are converted to configuration objects. Called when the object is created, it may be used to initialize some state before any other method in the object is called. If this method is implemented, it has to call the__init__() method of the parent class. Finalize_instanceCalled when the component object in Simics has been created. The first thing finalize_instance in the base class does is to calladd_objects() if the component is not instantiated. If this method is implemented, it has to call the finalize_instance() method of the parent class.instantiation_doneCalled when the component is instantiated. Note that this method is not called when loading a checkpoint with already instantiated components. If this method is implemented, it has to call theinstantiation_done() method of the parent class. The last argument, top_level, should be set to True for top level components; the default value is False. The register function will add some additional attributes fortop level components, and also check that the component class implements all top-level-only methods. 44 Pin IDE connector powers the Drive no other cables or adapters are needed. Whether the CPU/ system fan speed control function is supported will depend on the CPU/ system cooler you installed. Once you have the sketch loaded on the XIAO open up the serial monitor and observe the results. Turning the potentiometer should produce results ranging from 0 to 4095, as we have set the A/D converter to 12-bits. One simple method of ensuring that you have the correct cable is to use a microUSB to USB-C adapter. This is the method I employed, and it works very well. Otherwise, you’ll need to look for a USB-C cable that is designed for both data and power. The Seeeduino XIAO uses a USB-C connector for both power and data, so you will need a USB-C cable to connect it to your computer. L – – This is the User or Built-in LED. It is connected to data I/O pin 13, just as the built-in LED on the Arduino Uno is. To the left of the USB-C connector, you’ll see two pads labeled “RST”. The XIAO does not have a reset switch, instead, you need to short these two pins together to perform a reset. The most prominent feature on the top of the XIAO is the USB-C connector. Remember, the Seeeduino XIAO I/O pins are 3.3-volt logic, and they are NOT 5-volt tolerant! If you need to interface with 5-volt logic devices you’ll need to use a level converter to avoid damaging the XIAO. If you apply 5-volts to pin 13 you can use pin 11 as a 3.3-volt output. You can also power the XIAO by providing your own 3.3-volt power supply and connecting it to pin 11 – in this case the 5-volt pin is non-functional. Learn how to identify and connect PC power supply connectors with this full picture guide. I set the board up with a Pentium 4 2.8 GHz “e” model chip with an 800 MHz FSB, and it performed flawlessly. The Soyo SY-P4I875P DRAGON 2 v1.0 Black Label motherboard gets its name from the black finish applied to the board itself. It’s eye-catching in a computer case that’s been modified with a side window and some internal lighting. But this finish isn’t the only thing that marks it as a board for people who like to customize Windows or Linux PCs and who appreciate a high-performance machine. This adapter also can be used to make a SATA drive into a convenient external hard drive. Existing open-source projects address the technical challenges of cataloguing and transferring data for a wide range of use cases. However, there is no open-source effort aimed at providing an interoperable, cross-organization framework for data sharing that is built on a common identity model and uniform policy enforcement. If you are setting up a SCSI RAID array, run the SCSI controllers tests and the hard drive tests in the system diagnostics (see “Running the System Diagnostics”). The SCSI controller on the system board supports integrated mirroring of two SCSI drives. Both hot-plug and non-hot-plug drives can be mirrored. When you format a high-capacity hard drive, allow enough time for the formatting to be completed.
We have a stack of slim IDE DVD-ROM drives that came out of old laptops that have since been recycled. Up to now, they were reused if a laptop came in out of warranty with a dead optical drive. It was now nearly three months since I had bought that drive, and already I could see drive prices dropping below what I had paid. I thought of the additional cost of the GSI 2C. Add to that the many hours I had spent trying to get things to work and waiting for long formats and scans and copies to complete. The whole SCSI incident had annoyed me, but this IDE matter was even more irritating. At the University I had assignments to do and exams to study for. The last thing I wanted was to spend several hours every week fighting with the computer. When it detects an unpartitioned drive, the GSI 2C offers to partition and DOS-format it for you. I initially said ‘no’ to the offer, and went on to use DOS’s fdisk. The first time I tried, fdisk told me my drive was somewhere around 3.5GB. After ‘playing around’ and making a few partitions with fdisk and removing them, fdisk started reporting another different value for the size of the disk. I deleted all partitions, and then when the 2C asked me about making a partition, I said “Yes”. I’m still not sure what was going wrong with fdisk, but after a lot more experimenting, it looked like that problem was gone for good. The drive was now working okay under Windows 95’s DOS. Like my SCSI page, this page is a fairly long, technical, and somewhat dull description of what I did to my computer to make it do something. It’s probably not of interest to anyone other than people who have similar hardware, or those who are interested in the technical aspects of different computer setups. Technical information comes from many sources – primarily web pages but also from other people and books. Orders that contain end of life products that are no longer in production may be replaced by a compatible product with the same FRU number offering same functionality. Double check all connections and make sure the device is set correctly as slave. Turn off the computer where the failed drive was installed. Have one of these card recently as my motherboard do not have IDE port. Why do you want to avoid the on-board SATA controller? If the on-board controller is 3 Gbps, it’s usually faster than an external chip attached to PCIe x1 (2.5 Gbps in total for both ports). I understand of your busy, if you could direct me to a Bios i could flash that will allow my drive to be usable as a boot device through the JMB363, i would be forever grateful. The NON-RAID part works fine but the add-on card is still recognized as RAID controller, Below you can find the ‘official’ NON-RAID rom. I’m trying to do the same for the Marvell 9128 option ROM. Specifically, I need to disable option ROM and get it to boot up in AHCI mode. The PCI config registers on the Marvell would be entirely different to the JMicron, so without some info from the manufacturer, I’d be stabbing in the dark. But my BIOS detects one disk connected via SATA and other via IDE. Your patch nullified IDE mode and I have the HDDs connected via SATA. Option ROM not enabled by setting df, so the disks are not bootable. Since setting df causes “jump out of Option ROM, do nothing” (See release notes for v1.03), it is no longer possible to boot from any disks attached to the chip. Thanks for sharing your opinions about the IDE2SAT.
Top-level components need two additional methods that are used by the component system to handle clock domain configuration and to keep track of all processors in the component hierarchy. There is also one optional method that is used to restore the processor list from a checkpoint. The IDE to SATA Adapter is suitable for installation in any computer case, as it is requires minimal space and does not impact airflow. However, like many Arduino-compatible boards, the XIAO already comes from the factory with the Blink sketch installed. Powering up the device should result in the yellow “L” LED flashing at a rate of one second on, one second off. So uploading the Blink sketch as it is doesn’t really prove anything. The XIAO has a yellow LED labeled “L” beside the USB-C connector, and it is connected to pin 13 just like the built-in LED on the Arduino Uno. This processor is used in a number of other microcontroller boards, including the Arduino Zero , Arduino MKRZero and Arduino MKR 1000 boards. Seeedstudio also makes the Seeeduino Cortex-M0+ and Seeeduino Lotus Cortex-M0+, both of which support Grove connectors. Adafruit and Sparkfun also make boards using the SAMD21 microcontroller. The Seeeduino line of microcontrollers from Seeedstudio are Arduino-compatible boards, kits, and peripherals. Many of them include “Grove” connectors, an interface standard used by Seeedstudio and some other manufacturers to simplify interfacing microcontrollers with external sensors and displays.
Are Google Photos permanently deleted?
If you have turned on Back up and Sync, photos and videos you delete will stay in your trash for 60 days before they are deleted forever. Learn how to turn on Back up and Sync. Tip: To move all your photos to a different account, share your photo library with that account.
Press “Execute”, then confirm both times when prompted. These drives connect to the pc via the USB ports and you can have as many as you need. They can be plugged in and unplugged while the PC is turned on. IF you have a lot of pictures or other files you want to save, you can opt for an external hard drive. On the Right is the SATA Drive with cables attached. Notice the data cable is much smaller than the IDE Ribbon cable. Everything stored on a hard drive is measured in terms of its file size. Documents are generally very small whereas pictures are large, music is even larger, and videos are the largest. Digital files are measured in terms of megabytes , gigabytes , and terabytes . After connection, the PC will provide power to the NodeMCU. Now from theTools…Boardmenu, the dropdown list will contain many different hardware boards. This will display the new ESP8266 driver as supplied by the ESP8266 Community. At the bottom of the options box, select the version to be set up . The schematic I’ve seen lists the 5v to 3v3 voltage converter part number as XC6206. If you don’t have the Adafruit Universal Sensor Library installed you’ll be prompted to install it along with the AM2320 Library. Choose this option and both libraries will be installed. In this sketch, we are going to read the value of the pushbutton we have connected to pin 7 and will then write that value to both the LED on pin 9 and the built-in LED . If you don’t see that then your cable is not suitable. But you should be aware that not all USB-C cables will work, as many of these cables are exclusively for delivering power and won’t carry data. Now that the new Boards Manager has been installed into your Arduino IDE you can perform the final step – installing the Seeeduino XIAO board itself. You can use the VCC and GND connections underneath the XIAO and apply 3.7 to 5-volts. This is an ideal method of powering the XIAO with a small LiPo battery. The Seeeduino XIAO is a tiny module with 14 output pins, as well as a few other surface connections. The XIAO is available individually or in 3-packs, and it’s a quality build. The boards are packaged with some male header pins which you can solder in if you wish to use them, or you can just wire to the pins directly. Difference between IDE and SATA is A) speed, B) connector, and C) future existence. Motherboards being put out even now have been removing the IDE ports – they’re big, bulky, and add space without being useful. When you use this adapter to get data from an old HDD,you should remove the drive from the old computer firstly. The committers have agreed to merge the codebases by integrating the IDS data exchange support into the core infrastructure framework. This will be done by having the Data Appliance GX codebase served as the initial commit. The Dataspace Connector codebase will then be iteratively merged into the former. A technical plan with milestones has already been developed for this integration effort and can start immediately upon project approval. Another topic to address will be the licensing of dependencies used by the components of Data Appliance GX and Dataspace Connector as the project’s basis. As an example, the Dataspace Connector uses Spring JPA, which itself makes use of Hibernate . The connector will provide an open and publicly accessible solution for data providers and consumers, allowing them to concentrate on the use case at hand. Eclipse Dataspace Connector provides a connector framework for sovereign, inter-organizational data exchange.
From what I recall, an 80-wire cable is only needed for IDE ATA hard drives so that it runs at 66 instead of 33. The I/O controller is one of the most incredible chips I’ve ever seen on a PC motherboard. You can run various RAID combinations on the SATA drives, and set up the two of the eIDE channels for IDE-RAID as well (ATA133 IDE- RAID 0, 1, 0 + 1). And you can have different RAID options running on your eIDE and SATA drives at the same time. The Dragon 2 also comes with a media card reader that fits into either a floppy drive bay or a full-size 5.25-inch CD-ROM bay . Besides a Firewire port and four USB 2.0 ports on the back of the PC, the Dragon 2 package puts another Firewire port on the front of the media reader. The reader has four other slots that read nine types of removable memory cards, including Compact Flash, Smart Media and SD cartridges. You can use one of those slots to add a high-end audio card that reduces processor overhead slightly, but the Dragon 2’s built-in audio is no slouch. The board has a CMI 8738 audio chip that can generate six-channel audio. What counts is whether a system does the jobs you want to do, and handles them smoothly. The data economy is a strong driver for new business models and creativity.
Note that we invoke the XIAOs internal pullup resistor on the pushbutton input. We start by defining constants to represent the pins that the pushbutton and LED are connected to. We also define a boolean that represents the current button state. You can experiment with the analogReadResolution function and set it to different values to see the result. The Loop is pretty well what you would expect, we read the value from the analog port and assign it to our variable, then we send it to the serial monitor. SerialUSB is used with boards based upon the SAMD21 like the XIAO. It allows access to the native USB port on the microcontroller. And the baud rate of 9600 is just a place filler, in actual fact there is no speed setting but the Arduino compiler will produce an error if it doesn’t have a value here. This is an extremely simple sketch that simply reads the value from the potentiometer attached to analog input A2 and displays that value on the serial monitor. If the Additional Boards Manager URLs textbox already has an entry then click on the button to the right of the textbox. This will open up a dialog box which will allow you to add additional board managers. Paste the above link into this box, below the other entry or entries. The underside of the Seeeduino XIAO also has a few extra pads for additional connections. R – – This is the Receive LED, indicating activity on the USB-C bus. You can do much more with these pins, by resetting twice in quick succession you can have the XIAO load a fresh copy of the bootloader. In addition to the pinouts, we just covered there are a few other connections on the XIAO, as well as some indicator LEDs. With the exception of pin 0, all of the pins on the Seeeduino XIAO support PWM. Many of the other pins on the XIAO module have additional functions. The USB-C connector powers the XIAO from the attached computer. We have already done that with the ESP32 boards, they are much more powerful than the ATMEGA328-based Arduino boards and have a wealth of additional features. And there are other selections as well, Arduino themselves have a range of more powerful microcontroller boards based upon 32-bit processors instead of the old 8-bit designs like the Uno. I plugged in blue to board and black to HDD to make sure my cable worked…. Then powered down plugged black into board blue into drive.. Just want to connect a 52x32x52x CD-RW and a 8x4x32x DVD+/-RW SL. Apparently the 40-wire cable I have supports 66MB/s.
Can I connect HDD to iPhone?
Note: The Lightning to USB 3 Camera Adapter can be powered with a USB power adapter. This allows you to connect USB devices with higher power requirements, such as external hard drives, to iPhone.
Basic actions a user can take to access inaccessible data. One of the basic rules with the appearance of inaccessible data is that we do not recommend to attempt a DIY (do-it-yourself) recovery! The consequences of some incorrect actions can severely complicate further data restoration and even make it impossible. However, in some cases, an advanced user is able to correct the situation without professional help. Our experience lets us conclude that there are minimal chances but they exist. We have the hard drive installed and it is time to determine if we have done it right. Making sure we have at least the monitor and keyboard connected to the computer, turn it on. At the appropriate time, usually during the POST phase, . Press the appropriate key combination to open the CMOS settings in the BIOS. Nearly all motherboards made in the last few years now use key to open the CMOS. While the software worked smoothly, I hit some bumps again when it came to the board layout and physically hooking up drives. Like the power connector, there was a design issue with the placement of the IDE sockets and drive housings in my ATX case. The IDE sockets are located near the bottom right-hand edge of the board, and the cables Soyo supplies are quite short. I couldn’t put drives in the two lower CD/DVD-ROM bays due to the aforementioned power connector placement. But when I put my CD-ROM and CD-RW into the uppermost bays, the cables would only reach the connector on the drive located second from the top. There’s a heck of a lot packed onto this board, but there’s one glaring problem I ran into with the design that may affect particular computer cases. The AT power connector is on the right-hand edge of the board about half-way down, and the power coupling plugs straight into the face of the board instead of coming out to one side. You just simply connect them together,insert the Power Plug,the hard drive will be spinning up,then you can transfer the data out to your new computer. Connect all power cables and interface cables to the other hard drives in the drive bay. If you are installing one or more SCSI hard drives, connect the interface cable to the drive and the SCSI controller on the system board (see Figure 7-9). Connect all power cables and interface cables to the hard drives remaining in the drive bay. If you have more than two SCSI hard drives connected to the SCSI controller on the system board, only two drives will be mirrored. Any remaining drives connected to the controller will function as conventional SCSI drives without data redundancy. PC Engines IDE Straight Conn to CompactFlash Adapter is a perfect replacement for PC hard disk drives, floppy power connector and 40 pin IDE connector.
It seems to be fixed to Raid, and the bios sees the drive connected as a raid controller. I attempt to solve this problem by hacking the JMB363 option ROM to put the card into AHCI mode, with partial success. The two SATA ports work in OS X, including hot-plugging, but I could not get the parallel ATA enabled, and I had to bypass loading the option ROM (thus, can’t boot from the SATA ports anymore). The patched ROM might also be useful for other OSes that don’t have Linux-style PCI quirks. Matrox® 4Sight XV6 is an expandable ruggedized computer designed for demanding imaging workloads. It can support up to three displays—VGA, DVI-D, HDMI™, and/or DisplayPort™—from the available outputs. In my opinion, there is no need for a fast boot drive , or for a boot drive altogether. A small boot partition on one of the drives would be just fine. You do not use the host operating system files all the time. Pretty much, only at boot time and when you make configuration changes. And, you usually boot once for long periods of time. So, boot speed is usually a negligible factor for the NAS. And, in case of a failure, you should be able to re-install the OS onto another drive no problem if you have an up-to-date configuration backup. I would be looking for one with built-on video and gigabit LAN.